|
What’s Needed:
• A server or computer running Windows Server
2003.
• 2+ GB of RAM. The more you have, the better.
• 20 GB of free hard drive space (12GB will do if you have limited hard
drive space).
• A decent processor. I would recommend at least
an Intel P4, 3Ghz processor (or an AMD equivalent).
• VMware Server - This is a free virtualization
application you can downloaded from the VMware
web site.
(It is assumed for this install you do not have any
other versions of VMware installed on your server)
• Windows Server 2008 Enterprise - You can download
a trial version or if you have a TechNet subscription,
get a copy from there.
• Note: If you want to be able
to access
and manage your virtual machines from a computer
on the network, other than the Host computer
you install VMware server on, you will need to have
IIS installed on the Host computer. Install
IIS before you install VMware Server. IIS
is Internet Information Server - the Web Server
software that comes with Windows Server operating
systems.
Overview 
VMware Server for Windows Hosts is
just an application that is installed and run on a
Windows server operating system (it can't be installed
on a Windows desktop OS). It installs like any other
Windows application. A full install (default) takes
up about 250MB of hard drive space.
Note: In VMware, the Host
operating system is the OS that you install
VMware Server on. The Guest operating
systems are
the OSes you install in the VMware virtual machines
you will create. Once you
install VMware Server on the Host operating system,
you use the included VMware Server Console to create
one or more virtual machines. Once a virtual machine
is created, you install a Guest operating system in
the virtual machine.
It's important to note that VMware
Server virtualizes the hardware that
is used by the virtual machines you create after VMware
Server is installed. What this means is there is a
virtualization software layer that sits between the
virtual machines and the actual hardware in the Host
computer. This virtualization layer allows
the virtual machines to be hardware independent. That
is, VMware will install its own drivers that communicate
with the hardware.
Note: Not all hardware
devices will use VMware drivers. It depends on the
hardware and if there are VMware drivers that will
work with the hardware.
Generally, you don't have
to install NIC, or Video, or Hard Drive Controller
driver software in your virtual machines (Guest operating
systems). VMware tells a Guest operating system, that
you install in a virtual machine, what hardware to
use. The Guest operating system does not communicate
directly with the hardware on the Host computer.
Click
Here to see a screen shot of Device Manager
on my test Windows 2008 server. You will notice many
devices are named VMware. VMware even added a Floppy
controller and drive, along with the SCSI controller
and drive, which the test PC does not physically have.
This is virtualized hardware.
The virtual machines you create
after VMware server is installed, will require
sufficient hardware resources to run them. For this
installation, we will be creating a virtual machine
and then installing Windows Server 2008 in that virtual
machine. You should have a minimum of 1GB of RAM
to properly run this operating system, so if your
Windows 2003 server needs 1GB of RAM to run, then
you will need an additional 1GB of RAM for Win2008.
The test system I use has 4GB of RAM and uses a P4,
3.0Ghz Intel processor. I currently run Windows
2003 server as the Host operating system,
and have two virtual machines running on it. Each
OS, the Host and the two Guest operating systems
(virtual machines), share the total available RAM
in the Host computer, with the virtual machines
allocated 1GB of RAM each.
Another consideration is disk
space. You will need
adequate disk space for your virtual machines. Each
VMware virtual machine creates a file that is the
virtual machine. Whatever the Guest operating system
you are installing in a virtual machine requires
for disk space, you should have that much free disk
space on you hard drive. It is a good idea to create
a separate partition for each virtual machine, and
allocate the needed hard drive space to those partitions.
I would recommend 1GB of available RAM and a 20GB
partition for this Windows 2008 Server install.
(You can do this with lesser resources, say 512MB
of RAM available and a 12GB partition if your resources
are limited.)
Downloads:
VMware Server is a free application you
can download
here. You will need a serial number,
and that too is free. Instructions for obtaining
the serial number are on the download page.
Windows Server 2008 is available to
TechNet subscribers, or you can get a free trial
version here.
You will have to go through a registration process
to obtain a valid product key. Make sure you download
the correct language version (English language DVDs
are ...EN_DVD.iso)
Installing VMware Server
The download for VMware Server (v1.0.3) is about 150MB
in size. Once downloaded, double click the executable
file to install VMware Server. The installation is
the same as any Windows application. You will go through
the standard series of installation screens and might
be asked to reboot at the end.
Installation Notes:
• On a Windows Server 2003 Host, you must be logged
on as a local administrator (that is, not logged on
to the domain) to install VMware Server.
• A warning appears
if you are installing VMware Server on a Windows Host
configured as an Active Directory server. You can safely
ignore the message by clicking OK to continue the installation,
or you can choose to cancel the installation.
• VMware
Server must be installed on a local drive, not a network
drive.
• If the installer detects that the CD-ROM
autorun feature is enabled, it displays a dialog box
that gives you the option to disable this feature.
You should do this. Disabling it prevents undesirable
interactions with the virtual machines you install
on this system.
Creating
a Virtual Machine
You
are now ready to create the Virtual Machine you will
install Windows Server 2008 in. A
virtual machine is the virtual operating system environment
that runs on your Host operating system. In this
case, the Host operating system is Windows Server
2003. VMware virtual machines allow you to run
more than one operating system on the same physical
computer. Each operating system, excluding the Host
operating system, is run in its own virtual machine
(this is called a Guest operating system), and each
virtual machine is isolated from the Host operating
system and other virtual machines.
Since we are going
to be testing Windows Server 2008, we will first
create a virtual machine, and then install the Windows
Server 2008 operating system in the virtual machine.
This allows us to run two operating systems on the
same physical computer, at the same time.
Using VMware
Server, you can create many virtual machines
on the same physical computer, and run a different
operating system in each one - as long as you have
the needed hardware resources. VMware Server supports
a variety of Host and Guest operating
systems, including Windows and Linux. See the VMware
Server online documentation for more
information.
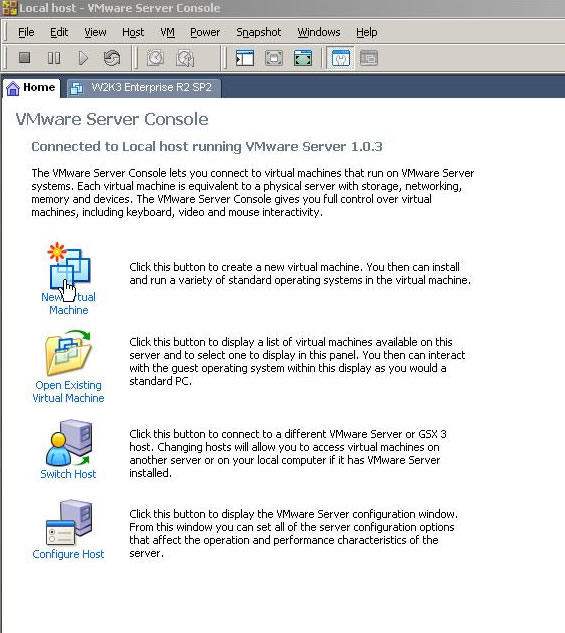
Creating your first Virtual Machine
Double click the VMware Server Console icon on your
desktop or click Start>All Programs>Vmware>Vmware
Server>Vmware
Server Console. This will open the VMware Server
Console. The VMware Server
Console is where you add, delete and manage your
VMware virtual machines. Choose Local Host in the
first window that opens since you will be managing
virtual machines on the local PC.
On the Home tab, click
on New Virtual Machine. This
will start the wizard to create a new virtual machine.
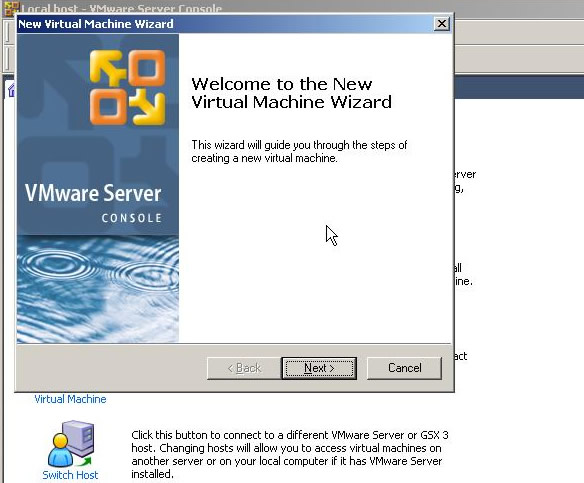
Click next to start the VM Wizard
Choose the Custom Install.

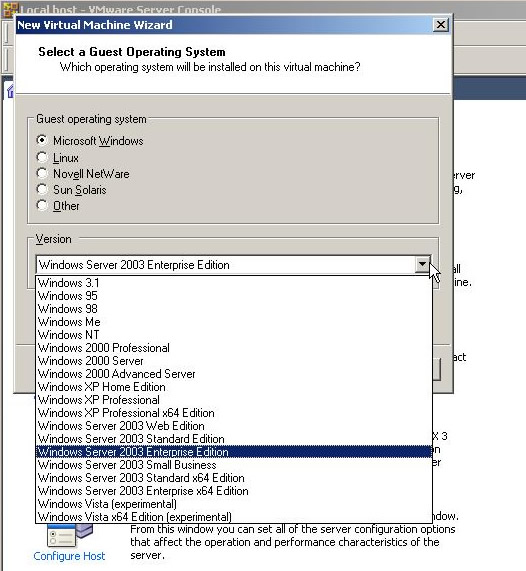
Choose your Guest Operating
System. Since Windows
Server 2008 Enterprise is still in BETA, it will not
be listed. Choose the closest thing, Windows Server
2003 Enterprise. Also note, the
operating system choice here will determine what
configuration choices will follow. So if you chose
Windows XP, you would see different choices than
if you chose Windows Server 2003.
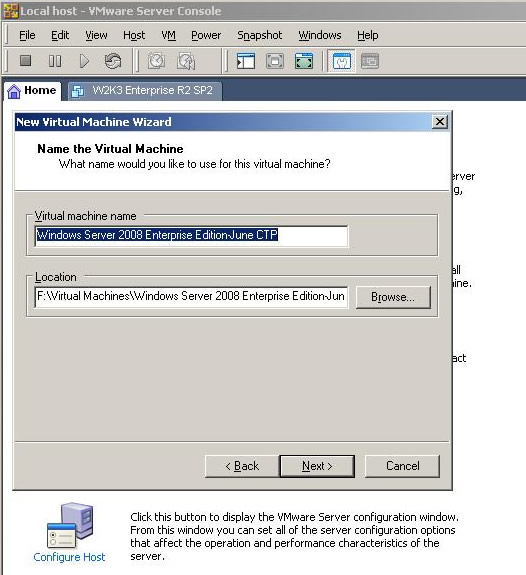
Give your virtual machine
a name and choose its location.
The location ideally will be its own partition. The
wizard will automatically create a \Virtual Machines
directory. (you can change this)
Choose the access rights
to the virtual machine. I leave this blank unless
you only want certain people to be able to access this
VM in the VMware Console on the server.

Choose who can startup and
shutdown the VM. Since this is a test environment,
leave the default setting unless you have a specific
reason to change it. In a production environment,
you would probably want to be more restrictive and
use a specific account. This option determines which
user account the virtual machine uses when it runs.
This account is used for actions like network access
from within the virtual machine and access to virtual
machine resources that are on the network, as well
as who can startup and shutdown the VM.

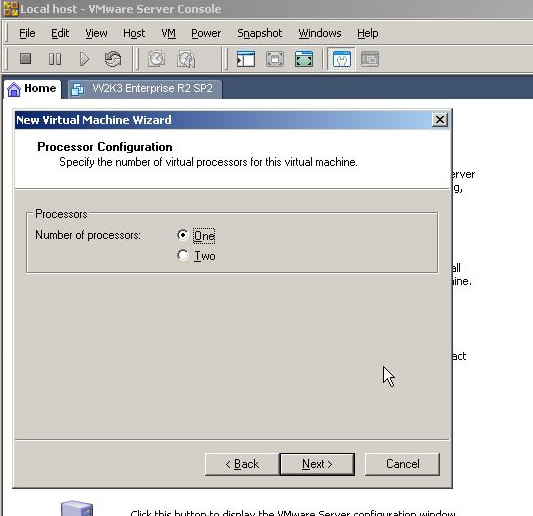
Choose the number of processors. VMware
Server can recognize up to two physical processors.
Multicore processors are considered a single physical
processor.
Choose the amount of memory
the VM will use. This
depends on how much total memory you have in your server,
and how much you want to allocate to this VM. For Win2008,
1GB is a good amount to start with.

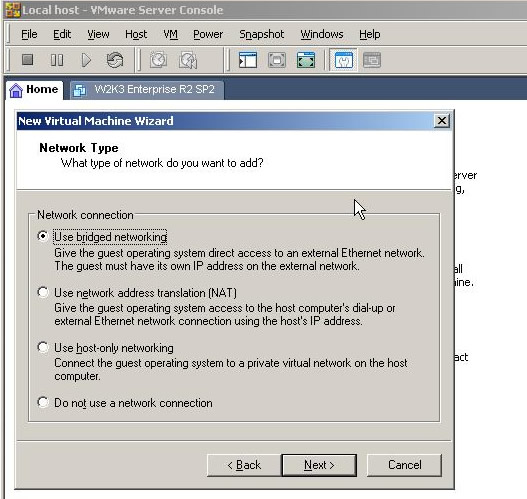
Choose the type of network
adapter (NIC) you want to use in your VM. VMware
server will install its own network driver. This
virtual driver will not be the same as the driver
your NIC is currently using for the Host operating
system. If your Host computer is on a network, and
you want to use a separate IP address for your virtual
machine (or can get one automatically from a DHCP
server), select "Use bridged networking".
Bridged networking creates a "bridge" between
the virtual machine and the physical NIC in your
Host computer so you can access the network in the
same way you would with a standard network card.
It connects the virtual network adapter in your virtual
machine to the physical Ethernet adapter in your
Host computer. For more information on the types
of virtual network cards in VMware Server, see the VMware
Server online documentation. After you
install Windows Server 2008 in your VM, you can change
the IP address settings for the Virtual NIC, in Control
Panel, just as you would in any Windows operating
system.
Choose the SCSI controller
you will use in your VM. Again, this is a
virtual driver and is not dependent on the actually
controller and hard drive you have in your Host computer.
My test system uses a SATA controller and hard drive
and I chose the LSI option. If you choose the BusLogic
controller, you receive a warning message that Windows
2003 does not support this. There will also be another
screen where you choose what type of Hard Drive to
use, IDE or SCSI. You can choose SCSI on this screen
too.
Also
note that
you cannot change the SCSI adapter type after you
create the virtual machine.

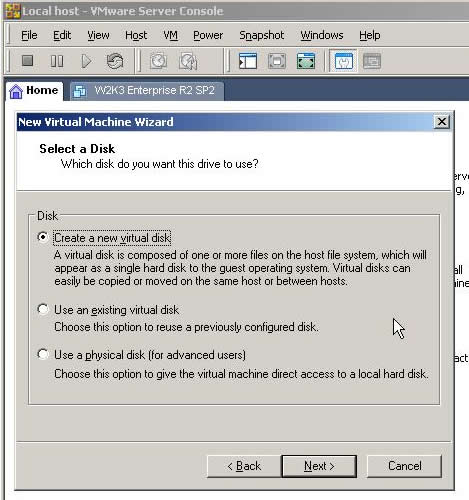
Choose to Create a new virtual
disk since we are creating a new virtual machine
and will be installing the operating system from
scratch.
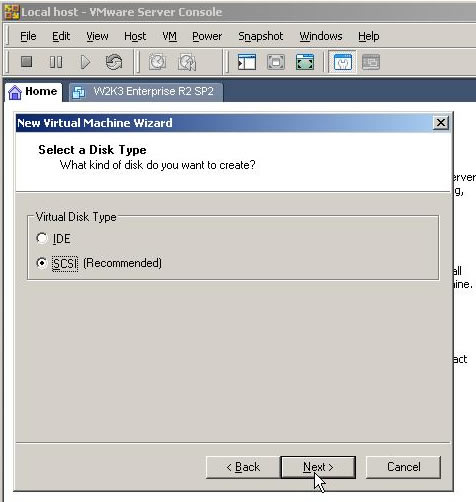
Choose a hard disk drive
type. Choose SCSI. Again
this is a virtual disk and virtual driver.
Note: if
you plan on moving your virtual machines to VMware
ESX Server or higher, these versions do not support
IDE virtual machines/drives.
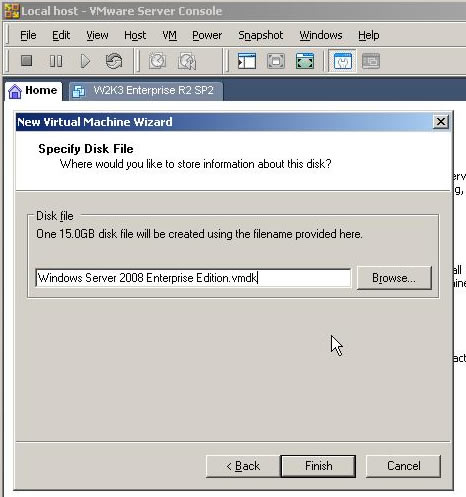
Specify how much disk space
the virtual machine will use. For Windows
Server 2008, 15GB is fine for testing. You can even
go down to 12GB. A new install of Windows Server
2008 requires about about 8GB of drive space. That
is just for the base operating system - without
anything added. Choose the option to allocate now
and the new 15GB virtual machine file will be created.
Virtual Machines actually exist as a single file
on the hard drive. This file will have the extension
of .vmdk. If you want to split the virtual machine
file into 2GB files (instead of one big 15GB file),
you can do this too. This is not usually necessary
unless you have a specific reason to do this.

Name the virtual machine
file. This can be whatever
you want. Notice the .vmdk file extension.
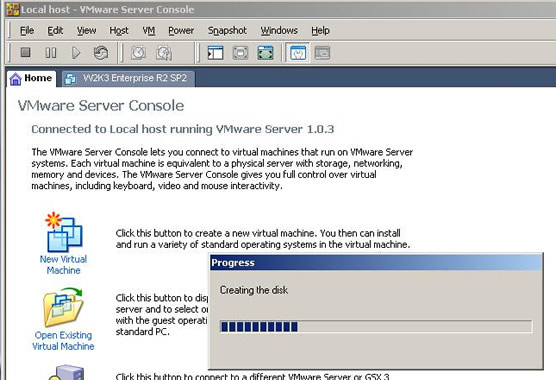
The Virtual Machine will
now be created. This will take
several minutes. Note: if you create
a VM on an existing partition that is already being
used, this process could take much longer. Using a
new, blank partition makes this process go much faster.
You will now have a new
tab with the new Virtual Machine. Now that
the VM is created, you can install Windows Server
2008 in the virtual machine.

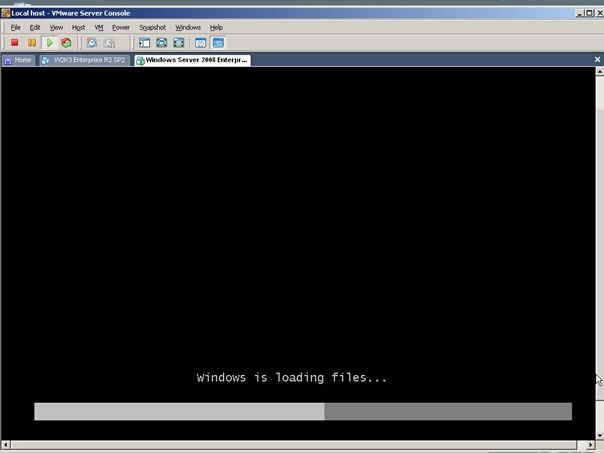
Installing
Windows Server 2008
Installing Windows Server 2008 is done in the same
way as you would on a stand alone computer. You insert
the Windows Server 2008 DVD in the DVD drive of the
Host computer, and click on "Start this virtual
machine" in
your newly created virtual machine. VMware will boot
the DVD from the DVD drive and the installation will
begin.
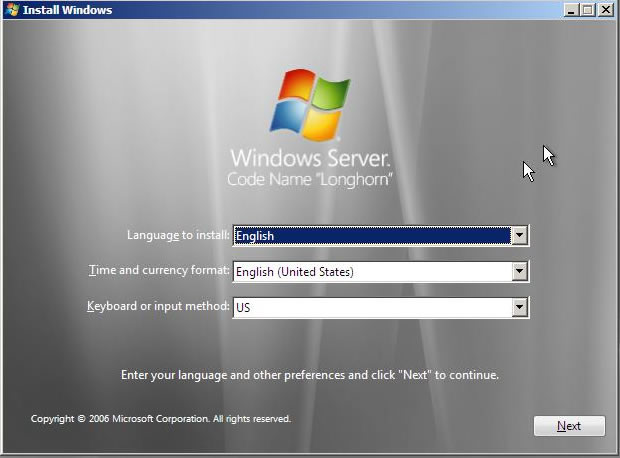
The first screen you come
to in the install is the
language and keyboard layout screen. Make your choices
and click Next.
The Install process begins. Click
install Now.

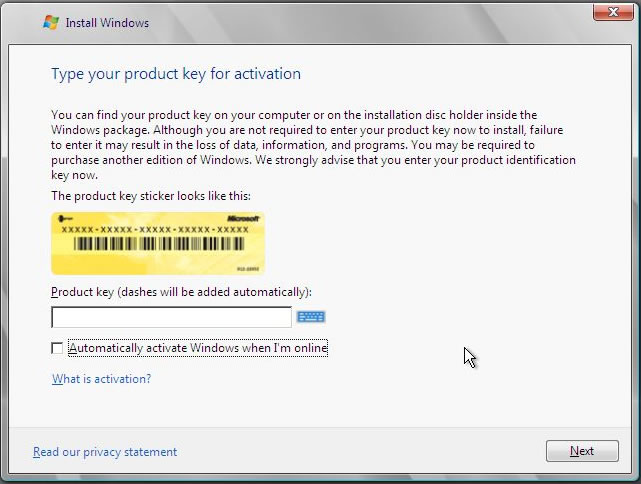
Enter your Product key. You
can uncheck Automatically Activate if you like. You
have 30 days to Activate after you install.
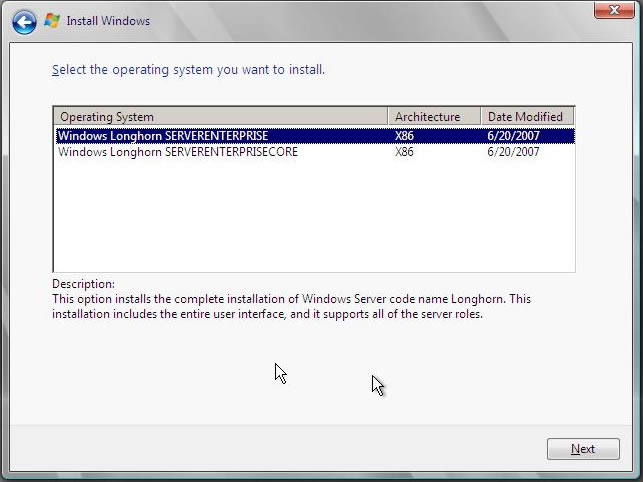
Choose the operating system
you want to install. Server
Core is a non-GUI version of Windows Server 2008. A
new option now available for Windows
Server operating systems. We are not installing Server
Core for this installation.
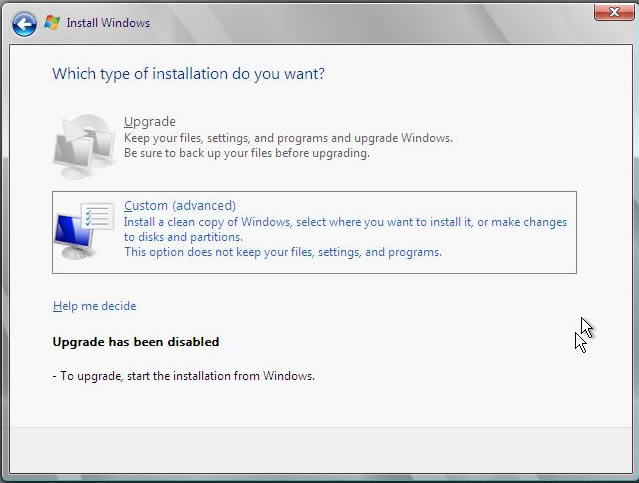
Choose the Custom Installation.
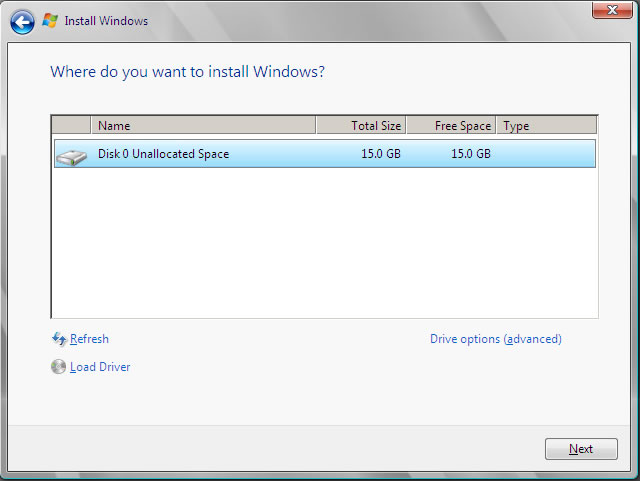
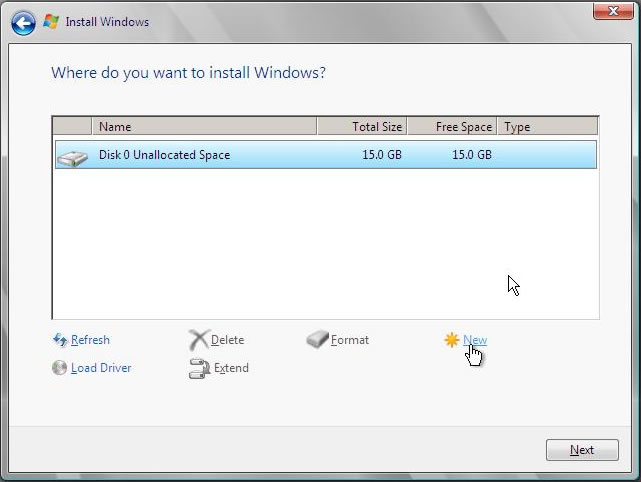
Choose the hard drive to
install Windows on. Notice
that Windows recognizes the 15GB virtual hard drive
(the virtual machine) we created.
Note: On
this screen, you can click the Next button if you
want Windows to use all the drive space and perform
a quick NTFS format. If you want more control over
the creation and formatting of the partition,
click
on Drive Options (advanced).
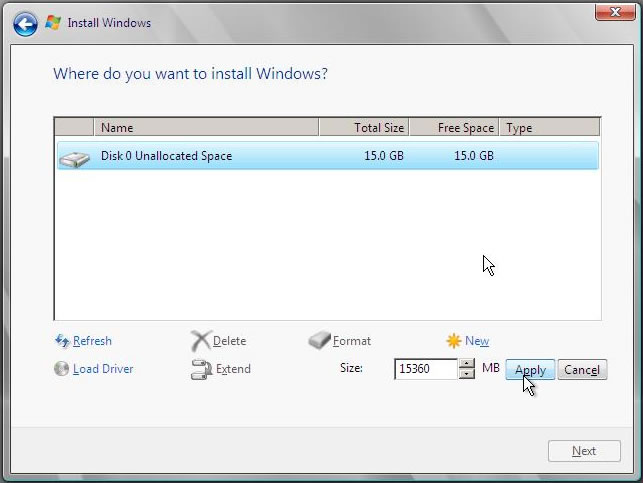
Advanced Drive Options. Click on New to create a new
partition.
Use all 15GB of space and
click Apply.
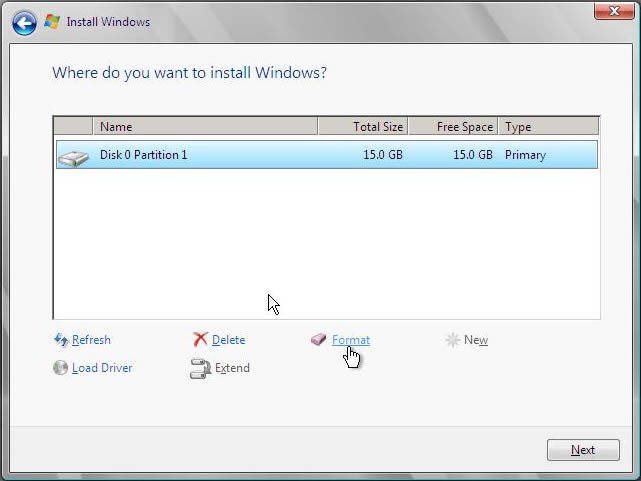
Format the drive and click Next.
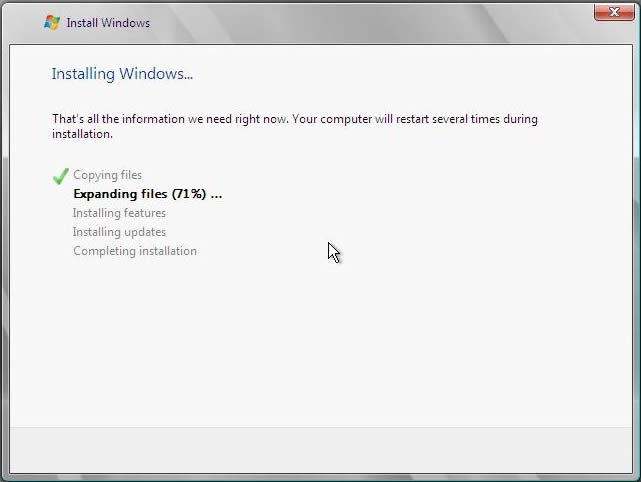
If you have installed Windows
Vista, the installation
of Windows Server 2008 is very similar. Windows
will now install files and reboot twice.
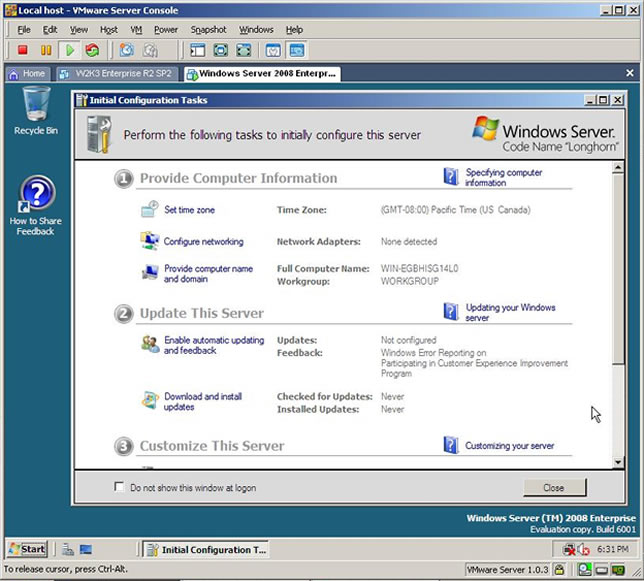
When the installation is
finished, Windows Server
2008 will boot up and you will prompted to create the
password for the local Administrator account. You might
be wondering where the screens are for Computer Name,
Network Configuration and Time Zone. These screens
are no longer presented during installation. You
configure these settings after the install, the
first time you login, using the Initial
Configuration Tasks window.

After your first login,
the Initial Configuration Tasks window automatically
opens. This window makes
it easy to set up the server. There are
different sections, each with a series of tasks. It
is a good idea to run through these tasks and
get them completed. However, since we are installing
in a Virtual Machine, we first need to install the
VMware Tools before we go any further.
Installing
VMware Tools
VMware Tools is a suite of utilities that
will enhance the performance of your Guest operating
system. They are included in the installation of
VMware Server. Once your Guest operating system has
been installed, in your virtual machine, the first
thing you should do is install VMware Tools. VMware
Tools will install enhanced video, mouse, and network
drivers as well as utilities to configure your virtual
machine. See the VMware
Server online documentation for more information
about VMware Tools.
To install VMware Tools, click the
VM menu option, in the VMware Server Console, and choose
"Install VMware Tools". Note: you
cannot install VMware Tools, in a virtual machine,
until the Guest operating system has been installed
first.

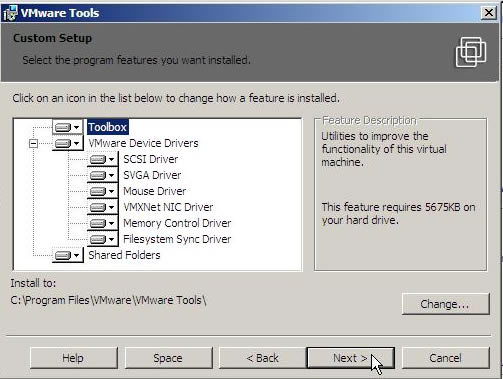
VMware Tools installs like
any other Windows application. Choose the Custom Install
and then choose the components you want.
If there are drivers you know you do not need,
you can deselect them, but generally, it is best to
install all listed components. Once VMware Tools has
been installed, you will be prompted to restart your
Virtual Machine. You will also see a VMware Tools icon
in the Sytem Tray.
Once the virtual machine
reboots, you will login to Windows Server
2008 and the Initial
Configuration Tasks window will again appear.
Go through the configuration tasks so your Win2008
server is setup. Do the following:
• Set your Time Zone
• Rename your Server. Windows will assign it some random name during the
install. Give it a normal name.
• Set a static IP address for your NIC (as a server, it should have a static
IP address). It should be on the same subnet as your Host server, but have
a different IP address. Note: you
can actually create virtual switches and networks among your virtual machines
using VMware. Read the VMware
online documentation for more information about this.
• For now, Turn off the Windows Firewall. The Windows Firewall will be enabled
and configured to block everything by default. Very annoying. For now, disable
it until you are comfortable with network communications to/from your virtual
machine.
At this point, think of this virtual
server as a "real server". You will configure
and use it in the same way as if it was a stand alone
server. And it will function as if it was a stand
alone server running Windows Server 2008. You can access
it from the network, make it a domain controller
and join PCs to it, install operating system components
and applications on it, and all the while it will
be running at the same time and on the same physical
server as your Host operating system, Windows Server
2003.
Additional
Notes
• When working in the VMware Server Console,
you can press CTRL+ALT to move the mouse focus from
the virtual machine to the Host computer desktop.
• With the focus in a virtual machine, use CTRL+ALT+Insert
instead of CTRL+ALT+Delete.
• If you are going to shutdown or reboot your Host computer, shutdown your
virtual machine operating systems first.
• If your virtual machine does not boot your Windows DVD because it
cannot find a boot device, click the VM menu in the Server Console, click Settings,
click the CD-ROM drive listing to highlight it, and in the right hand pane, change
Auto detect to the drive letter your Host computer uses for the DVD drive. Then
try starting your virtual machine again with the install DVD inserted in the
DVD drive.
• I would strongly suggest you read the VMware
online documentation along with the PDF
help files you
can download from the VMware site. There is a lot to
VMware Server that you should investigate. There are
also VMware
forums where you can find useful information
and ask questions.
• Like any software, VMware is not without its bugs. Some may affect you,
some not. Again, the VMware forums are a good place to find help and information.
• Books on VMware Server are few and far between. I would have thought there
would have been numerous books out there on this popular virtualization software,
but there are surprisingly few. One I would suggest is
VMware
Server and VMware Player by Dennis Zimmer. It is a little expensive,
and somewhat crudely published, but it has a great deal of useful information.
Especially if you are new to VMware Server.
• Windows Server 2008 is still in BETA so don't expect perfection. Microsoft
has announced Windows Server 2008 will go Gold in February of 2008, so there
is plenty of time to start experimenting with it.
• One thing that does not work in Windows Server 2008 is GPMC - Group Policy
Management Console. At least up to and including the June 2007 CTP. Hopefully,
in subsequent builds/releases, this will be fixed.
• Windows Server 2008 reminds me of Vista in that like Vista, it has similarities
to its predecessors, but yet in many ways is quite different. There will be a
learning curve, but Microsoft supplies an abundance of documentation to help
you get started.
If you want to access the VMware Server Console from
another computer on your network, do the following. Note: this
requires IIS be installed on the Host computer that has VMware Server installed
on it.
• Open Internet Explorer on a PC on your network. This
will work with both Windows XP and Windows Vista.
• In the URL field enter: https://<ip-address-of-
the-Host-server>:8333.
• If your Host server has an IP address of 10.90.10.10,
then use this URL: https://10.90.10.10:8333
• You could alternatively
use port 8222, http://10.90.10.10:8222 if SSL encryption is
not enabled in IIS.
• Once the browser page opens, you will need to enter a Username and Password. This
can be any valid Domain user and password or local user and password.
• On the same web page, there is an option to download the VMware Server
Console Windows application. Once downloaded to your network PC, you can install
it like any other Windows application.
You can use either the web interface to attach to the VMware Server, or the VMware
Server Console application installed locally on the network PC. The VMware Server
Console, you install on the network PC, provides the same functionality as
the VMware Server Console on the Host PC. The web interface has a much more limited
range of capabilities.
|

